仿iOS日历

概述

之前写了两篇文章简要的介绍了(CalendarSelector)库的使用方法和基本的实现原理,这篇文章呢主要来实现一个仿iOS日历的显示功能

预览

CalendarSelector库简介

CalendarSelector)库可以用来做日历的显示和选择功能,因为使用的是View组合的方式来实现的,而不是使用Canvas来绘制,所以自定义起来比较简单

仿iOS显示一年的日历

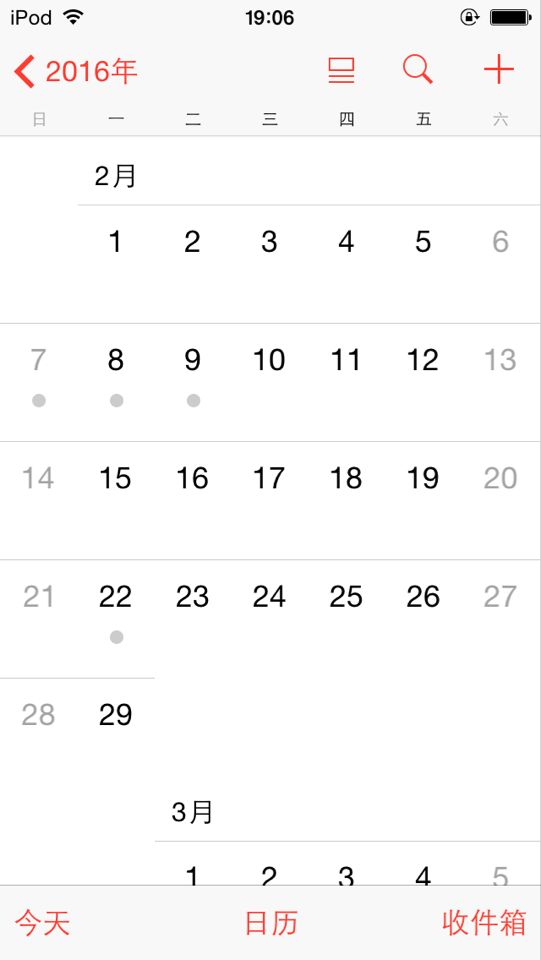
在苹果手机上看到下面日历显示的效果比较好,自己也想在Android上实现一下:)

预览

分析了下,要想实现这种效果,主要要解决三个显示相关的问题

  • 月份文字的显示位置(包括下面的那条横线)
  • 行中间的那几条横线的显示
  • 最后一行横线的显示

接下来集中来解决上面提出的几个问题

月份文字的显示位置(包括下面的那条横线)

经过分析可以知道,月份文字的显示位置其实就是该月第一天的起始位置,然后根据这个位置信息动态的计算下坐标,scrollTo(x, y)到相应的位置就行了(不采用改动layout的方式主要是为了性能考虑,调起requestLayout流程还是很耗时间的)

1
2
3
4
5
6
7
8
9
10
11
12
13
14
15
16
17
18
19
20
21
22
23
24
25
26
27
28
29
30
31
32
33
34
35
36
final int firstdayOfWeekPosInMonth = scMonth.getFirstdayOfWeekPosInMonth();
// wait for MonthView measure finish
holder.monthView.post(new Runnable() {
@Override
public void run() {
ValueAnimator lineAnimator = ValueAnimator.ofInt(0, -(firstdayOfWeekPosInMonth - 1) * holder.monthView.getDayWidth());
lineAnimator.addUpdateListener(new ValueAnimator.AnimatorUpdateListener() {
@Override
public void onAnimationUpdate(ValueAnimator animation) {
int scrollX = (int) animation.getAnimatedValue();
holder.flScrollLine.scrollTo(scrollX , 0);
}
});

ValueAnimator monthAnimator = ValueAnimator.ofInt(0, -(firstdayOfWeekPosInMonth - 1) * holder.monthView.getDayWidth()
- (holder.monthView.getDayWidth() / 2 - holder.tvMonthTitle.getWidth() / 2));
monthAnimator.addUpdateListener(new ValueAnimator.AnimatorUpdateListener() {
@Override
public void onAnimationUpdate(ValueAnimator animation) {
int scrollX = (int) animation.getAnimatedValue();
holder.flScrollMonth.scrollTo(scrollX , 0);
}
});
AnimatorSet animationSet = new AnimatorSet();
animationSet.play(monthAnimator).with(lineAnimator);
animationSet.setInterpolator(new AccelerateDecelerateInterpolator());
animationSet.setDuration(500);
animationSet.start();

int dayCount = holder.monthView.getCurrentMonthLastRowDayCount();
View decorView = holder.monthView.getLastHorizontalDecor();
if(decorView != null)
decorView.scrollTo((7 - dayCount)*holder.monthView.getDayWidth(), 0);

}
});

自己加了一个动画,主要是想试一下效果:)

行中间的那几条横线的显示

看过(CalendarSelector)文档的都知道,库本身是支持添加行和列装饰的,在这里的话只需要过滤下第一行和最后一行,不进行设置

1
2
3
4
5
6
7
8
9
10
@Override
public Decor inflateHorizontalDecor(ViewGroup container, int row, int totalRow) {
return new Decor(mLayoutInflater.inflate(R.layout.view_horizontal_decor, container, false));
}

@Override
public boolean isShowHorizontalDecor(int row, int realRowCount) {
if(row == 0 || row == realRowCount) return false;
return super.isShowHorizontalDecor(row, realRowCount);
}

最后一行横线的显示

因为最后一行横线显示的位置也需要跟随天数,所以需要特殊处理一下,考虑到MonthView在RecyclerView中使用的情况,需要处理好复用还原的问题,所以添加了一个自定义属性来标识是否需要reset

1
2
3
4
int dayCount = holder.monthView.getCurrentMonthLastRowDayCount();
View decorView = holder.monthView.getLastHorizontalDecor();
if(decorView != null)
decorView.scrollTo((7 - dayCount)*holder.monthView.getDayWidth(), 0);
1
<attr name="sc_should_reset_decor" format="boolean"/>
1
2
3
4
5
6
if(shouldResetDecor){
for (int i = 0; i < horizontalDecors.size(); i++) {
DayViewInflater.Decor decor = horizontalDecors.get(i);
if(decor != null && decor.getDecorView() != null) decor.getDecorView().scrollTo(0, 0);
}
}

经过前面三步的实现,跟苹果的效果基本上相同了,具体实现可以查看[AppleCalendarActivity][1]示例代码

总结

可以发现使用(CalendarSelector)库来实现一些自定义效果还是比较方便的,自己也会尽可能的把一些有用的数据暴露出来。自己接下来会着重解决配合RecyclerView使用时遇到的性能问题(创建item view时会出现比较明显的掉帧现象)

[1] https://github.com/TUBB/CalendarSelector/tree/master/app/src/main/java/com/tubb/calendarselector/custom/AppleCalendarActivity.java